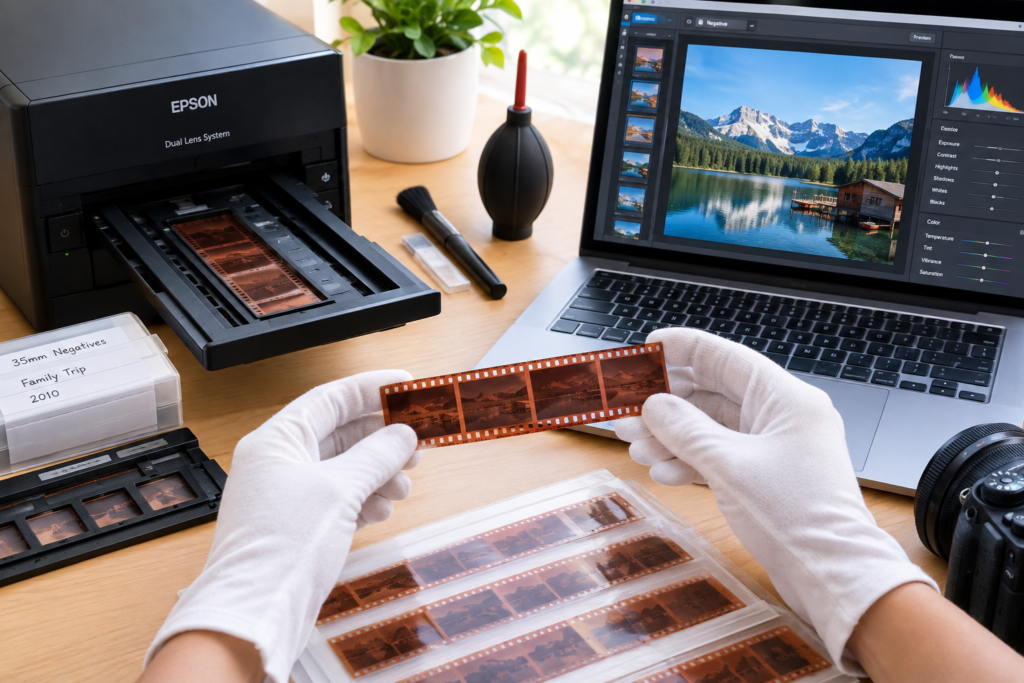
If you have a box, envelope, or drawer full of old film negatives, you probably have something more valuable than a collection of strips of plastic. Those tiny frames can contain family memories, vacations, birthdays, weddings, childhood moments, and everyday scenes that were photographed long before smartphones made digital pictures the norm. The challenge is figuring out how to scan negatives without damaging them or losing the quality hidden inside the original film.
Scanning negatives is easier than it may seem. You do not necessarily need an expensive professional setup, although dedicated film scanners can produce excellent results. Depending on the type of negatives you have, you can use a flatbed scanner with a transparency unit, a dedicated film scanner, a digital camera setup, or even a professional scanning service.
The important thing is to understand what negatives are, how scanning works, and which settings matter most. A good scan preserves much more than simply the visible image. It captures detail, color information, shadow areas, and highlights that can later be adjusted with photo-editing software.
This guide explains how to scan negatives from start to finish, including equipment, cleaning, resolution, color correction, file formats, common mistakes, and practical tips for getting better results.
What Are Film Negatives?
Film negatives are the original photographic film used in many traditional cameras. Unlike a normal printed photograph, the colors and brightness on a negative appear reversed. Light areas look dark, dark areas look light, and colors appear as their complementary colors.
When the negative is properly scanned, software or a scanner converts that reversed information into a normal-looking digital photograph. This process is commonly called negative scanning or film scanning.
There are several types of film negatives. The most common consumer format is 35mm film, which is usually stored in narrow strips containing several individual frames. Medium-format film is larger and can contain considerably more image information, while some older cameras used other film sizes.
Understanding your film format is important because not every scanner can handle every type of negative. A scanner designed specifically for 35mm film may not be suitable for larger medium-format negatives.
Why Scan Old Negatives?
One of the biggest reasons to scan negatives is preservation. Film can deteriorate over time, particularly if it has been exposed to heat, humidity, dust, or poor storage conditions. A digital copy gives you another way to preserve the images.
Scanning also makes old photographs easier to access. Instead of searching through envelopes and boxes every time you want to see a picture, you can organize the digital files on a computer, external drive, or cloud storage system.
Another advantage is editing. Once a negative has been digitized, you can crop it, remove dust spots, adjust colors, improve contrast, and prepare it for printing or sharing online.
The original negative should still be preserved whenever possible. A digital scan is a useful backup, but it should not be treated as a replacement for the original film.
Choosing the Right Scanner
The scanner you use can make a significant difference in the final image. Not every ordinary document scanner is suitable for film negatives because negatives need light to pass through them from behind.
A dedicated film scanner is specifically designed for this purpose. These scanners normally include holders for film strips and use a transparency light source to capture the image.
Flatbed scanners can also be useful when they include a transparency or film-scanning attachment. They are particularly convenient if you have different film formats and want a versatile device.
Before buying or using a scanner, check the manufacturer’s specifications for supported film types. A scanner that handles 35mm negatives may not automatically support medium-format film.
Dedicated Film Scanners
Dedicated film scanners are designed primarily for photographic film. They usually provide a film holder that keeps the negative at the correct distance from the scanning sensor.
One major benefit is convenience. Once the film is correctly positioned, the scanning software can often recognize individual frames and process them automatically.
Many dedicated scanners also provide infrared-based dust and scratch detection for compatible color films. This can reduce the amount of manual cleanup required afterward.
However, scanner specifications can sometimes be confusing. A device advertising an extremely high optical resolution is not necessarily going to produce dramatically better photographs. Real optical performance, dynamic range, film handling, and software quality are all important.
Flatbed Scanners With Film Adapters
Flatbed scanners can be a practical option if you want to scan both documents and film. Many models include a transparency unit or special film holder.
The scanner’s lid contains a light source that illuminates the negative while the scanning sensor captures the image. Without this transparency feature, a normal flatbed scanner may not produce useful results from film.
Flatbed scanners are particularly attractive for people who have a mixture of 35mm film, slides, and larger negatives. They can also be useful for scanning multiple frames at once.
The trade-off is that dedicated film scanners can sometimes provide greater detail and more precise film handling, especially with 35mm negatives.
Using a Digital Camera to Scan Negatives
Another method involves photographing the negatives with a digital camera instead of using a traditional scanner.
This technique can produce excellent results when the setup is carefully controlled. You need a camera capable of capturing enough detail, a macro lens, a stable stand or copy setup, and an evenly illuminated light source.
The negative is positioned in front of the camera while light passes through it from behind. The camera records the negative as a high-resolution image, which can then be inverted and corrected using editing software.
Camera scanning can be especially attractive if you already own suitable photography equipment. It can also be faster than traditional scanning when you have a large collection.
The downside is that alignment, lighting, focus, and exposure all need to be controlled carefully.
Prepare Your Negatives Before Scanning
Before you begin scanning, organize the negatives. Avoid immediately putting every strip into the scanner without checking its condition.
Look for dust, fingerprints, scratches, mold, and physical damage. Handle film carefully by its edges because fingerprints can leave oils on the surface.
If the negatives are stored in sleeves, remove them carefully. Do not pull film aggressively from a sleeve if it is stuck.
It is also helpful to organize your negatives by date, event, or roll. You can give the resulting digital files meaningful names later, which makes your archive much easier to navigate.
Cleaning Film Safely
Dust is one of the biggest problems when scanning negatives. A tiny piece of dust can become a very noticeable spot when the image is enlarged.
Start with a photographic air blower designed for cleaning. Use gentle bursts to remove loose particles.
For more stubborn debris, use an appropriate anti-static film brush or other manufacturer-approved cleaning method. Avoid touching the image area unnecessarily.
Do not use household cleaning products, paper towels, or random chemicals on old negatives. Some film surfaces can be easily damaged, and aggressive cleaning can permanently affect the image.
Handling Negatives Correctly
Always hold negatives by their edges whenever possible. Fingerprints can be difficult to remove and may become visible in high-resolution scans.
Keep the work area clean and dry. A dusty desk can quickly undo your cleaning efforts.
It is also wise to avoid bending film unnecessarily. Older negatives can become brittle, and excessive handling may cause cracks or other damage.
If a negative appears severely damaged, moldy, sticky, or fragile, consider consulting a professional film preservation or scanning service rather than experimenting with it yourself.
Selecting the Right Scanning Resolution
Resolution is one of the most important settings when you learn how to scan negatives.
Scanner resolution is generally expressed in DPI, or dots per inch. Higher resolution allows you to capture more information from the negative, but it also creates larger files and increases scanning time.
For ordinary 35mm film, a resolution in the range of roughly 2400 to 4000 DPI can be a useful starting point, depending on the scanner and your intended use.
Scanning at an extremely high advertised resolution does not always result in more genuine detail. The optical capabilities of the scanner matter more than simply selecting the largest number available.
Think about what you will do with the images. If you only need small digital copies for casual viewing, you may not need maximum resolution. If you want to make large prints or preserve an important archive, a higher-quality scan makes more sense.
Why Optical Resolution Matters
Scanner manufacturers may advertise very high numbers, but advertised resolution and actual optical resolution are not always the same thing.
Optical resolution refers to the detail the scanner’s hardware can genuinely capture. Interpolated resolution uses software to create additional pixels.
More pixels do not automatically mean more photographic detail. A high-quality scan at an appropriate optical resolution can be more useful than a much larger file produced through interpolation.
For archival work, concentrate on the scanner’s genuine optical performance and the quality of the film capture rather than choosing the biggest DPI number on the settings menu.
Choosing Between JPEG and TIFF
File format matters when scanning negatives.
JPEG is convenient because files are relatively small and compatible with almost every device. However, JPEG uses lossy compression, which means some image information is discarded.
TIFF is often a better choice for archival master scans because it can preserve substantially more information without the same type of lossy compression.
A practical workflow is to save a high-quality master file first, then create JPEG copies for everyday use.
This gives you flexibility. You can keep the original scan untouched while making different versions for websites, social media, email, or printing.
Should You Scan in Color or Black and White?
The answer depends on the original film.
Color negatives should normally be scanned using an appropriate color mode. Black-and-white negatives require a different approach because their tonal information is contained in shades of gray rather than color.
Some scanners have dedicated settings for black-and-white film. Others provide more general grayscale or color scanning options.
If you are unsure, capturing additional information during the initial scan can give you more flexibility during editing.
Understanding Bit Depth
Bit depth determines how much tonal information can be recorded in an image.
Many scanners offer settings such as 8-bit, 16-bit, or higher internal processing levels. A higher bit depth can provide more information for editing, especially when recovering subtle shadow and highlight details.
For important archival scans, using a higher-quality bit-depth setting can be worthwhile if your scanner and software support it.
The resulting files will be larger, but storage is relatively inexpensive compared with the effort involved in rescanning an entire film collection.
How to Scan Negatives Step by Step
The basic scanning process is straightforward once your equipment is ready.
Step 1: Identify the Film
Determine whether you have 35mm, medium-format, black-and-white, color-negative, or another film type.
Check the scanner manual to confirm that it supports the format.
Step 2: Clean the Film
Use a blower to remove loose dust. Handle the negative by its edges and avoid touching the image surface.
Step 3: Place the Film in the Holder
Position the negative according to the holder’s markings. Make sure the frame is flat and correctly aligned.
Step 4: Select the Scan Settings
Choose the correct film type, resolution, color mode, and file format.
For important images, consider saving a high-quality master scan rather than immediately creating a heavily compressed JPEG.
Step 5: Preview the Frame
Most scanning software offers a preview. Use it to check orientation, cropping, exposure, and frame selection.
Step 6: Adjust the Image
If your software provides negative conversion, color correction, or histogram controls, make adjustments carefully.
Avoid excessive automatic correction if you intend to perform detailed editing later.
Step 7: Perform the Final Scan
Once everything looks correct, start the high-resolution scan.
Step 8: Save and Organize
Give the file a meaningful name and save it in your archive.
Then create a backup rather than relying on a single copy.
Getting Better Color From Color Negatives
Color-negative film can be more complicated than simply scanning a normal photograph. The orange mask found on many color-negative films affects the colors recorded by the scanner.
Good scanning software can compensate for this during the conversion process.
Different film stocks can also have different color characteristics. Automatic software may produce acceptable results, but manual adjustments can sometimes provide a more natural appearance.
If a scan looks too warm, too cool, too green, or too magenta, do not immediately assume the negative is bad. The issue may be related to the conversion process.
Inverting Negatives Manually
If your scanner does not automatically convert negatives, you can scan the film as a positive capture and invert the resulting image using photo-editing software.
The exact process depends on the software, but the basic idea is to reverse the tonal values and then correct the color channels.
This method gives you significant control, although color negatives can require additional adjustments to remove the film’s orange base.
For people with large collections, specialized film-scanning software can save considerable time.
Correcting Dust and Scratches
Even carefully cleaned film may contain dust and scratches.
Some scanning software includes automatic dust and scratch removal. Certain systems use infrared information to identify physical defects separately from the photographic image.
This can be extremely useful with compatible color-negative and slide films.
However, automatic correction should be used carefully. Aggressive settings can sometimes remove genuine fine details, especially in hair, textures, or small objects.
For important photographs, keeping an untouched master scan and making corrections on a separate copy is a sensible workflow.
Fixing Faded Film
Old negatives may have faded or shifted colors. This is particularly common with film that was stored under poor conditions.
Editing software can often improve the appearance by adjusting levels, curves, saturation, white balance, and individual color channels.
Do not assume that the original photograph looked exactly like a modern digital photograph. Film has its own characteristics, and excessive correction can make an old image look unnatural.
A good restoration usually aims to recover useful detail while preserving the character of the original photograph.
Cropping and Straightening Scans
Film can sometimes shift slightly in the holder. As a result, the scanned frame may not be perfectly straight.
After scanning, crop the image to the actual frame boundaries and straighten it if necessary.
Avoid cropping too tightly during the initial scan. Keeping a small amount of surrounding information can be useful for future editing.
You can always create a clean final crop from a larger master file.
Naming Your Scanned Files
Good file organization becomes increasingly important as your collection grows.
Instead of using generic names such as scan001.jpg, create a naming system that gives you useful information.
For example, you might organize files by year, event, and roll number.
A consistent system makes it much easier to locate photographs years later.
You can also add metadata such as dates, locations, people, and descriptions when that information is known.
Backing Up Your Digital Negatives
Scanning your film is only half of the preservation process.
A hard drive can fail, a computer can be lost, and files can become corrupted. For important photographs, maintain multiple copies.
One copy can remain on your primary computer or storage drive, while another can be stored on a separate physical device. A cloud backup can provide another layer of protection.
The exact backup system depends on the size and importance of your collection, but the basic principle is simple: do not keep irreplaceable scans in only one location.
Common Mistakes When Scanning Negatives
One common mistake is scanning dirty film. Even a high-quality scanner cannot compensate for large particles sitting directly on the negative.
Another mistake is choosing an unnecessarily high interpolated resolution. Bigger files are not automatically better.
Overusing automatic color correction is another problem. Software can make incorrect assumptions about an old or unusual negative.
It is also easy to save everything as compressed JPEG files and later discover that you need information that was discarded during compression.
Finally, never throw away the original negatives simply because you have digital copies. The film remains an important original source.
When Professional Scanning Makes Sense
Scanning negatives yourself can be rewarding, but professional services can be useful in certain situations.
If you have thousands of negatives, the time required to scan them individually can become substantial.
Professional services may also have specialized equipment, calibrated workflows, and experienced technicians who know how to deal with damaged or difficult film.
For historically important photographs, rare negatives, or severely deteriorated film, professional handling can reduce the risk of accidental damage.
The decision usually comes down to budget, time, equipment, and the importance of the photographs.
DIY Scanning vs Professional Scanning
DIY scanning gives you control. You can choose the resolution, color treatment, file format, and editing style.
It can also be economical if you already own the necessary equipment and have a manageable collection.
Professional scanning saves time and may provide access to equipment that would be expensive to purchase.
Neither approach is automatically right for every collection. Someone with a few family rolls may enjoy doing the work personally, while someone with several hundred rolls may prefer a professional workflow.
How to Get the Best Results From 35mm Negatives
For 35mm film, careful preparation makes a noticeable difference.
Clean the film, keep it flat, use a good holder, and choose a sensible optical resolution. Preview every frame before committing to a high-resolution scan.
Pay attention to focus. Some scanners allow film holders or scanning positions to be adjusted for optimal sharpness.
If the scanner offers multiple focus options, experiment with a representative negative before processing the entire collection.
Most importantly, create a workflow and use it consistently.
Preserving the Original Negatives
After scanning, store the original negatives properly.
Keep them away from excessive heat, moisture, direct sunlight, and dust. Archival-quality sleeves designed for photographic film can help protect them.
Avoid storing film in places where temperature and humidity fluctuate dramatically.
Label the sleeves clearly, but do not write directly on the photographic image area.
A well-organized physical archive combined with a carefully backed-up digital archive provides much stronger long-term protection than either approach alone.
Final Thoughts on How to Scan Negatives
Learning how to scan negatives does not require complicated equipment in every case. The process can be as simple as cleaning the film, placing it in the correct holder, selecting an appropriate resolution, scanning it, and carefully converting the negative into a positive digital image.
The biggest improvements usually come from paying attention to details. Clean film produces cleaner scans. Proper alignment improves framing. A sensible resolution preserves useful detail without creating unnecessarily enormous files. High-quality file formats give you more flexibility during editing.
If the photographs are particularly valuable, take your time. Make test scans before processing an entire collection and keep your original master files untouched.
Most importantly, remember that film negatives are original photographic records. Treat them carefully, preserve them properly, and use digital scanning as a way to make those memories easier to enjoy without sacrificing the originals.
YOU MAY HAVE MISSED