Introduction: Why Learning How to Reseal Windows Matters
Windows are essential to a comfortable home, but they can also become a source of drafts, moisture, dust, and unwanted noise when their seals begin to fail. Over time, the caulk around a window can crack, shrink, peel away, or lose its flexibility. When this happens, outdoor air and moisture may find their way inside, potentially affecting indoor comfort and contributing to water damage.
Learning how to reseal windows is a practical home maintenance skill that can help prevent minor problems from becoming expensive repairs. In many cases, you can restore the weatherproof seal around a window using basic tools, a suitable sealant, and a little patience. The key is understanding where the seal has failed and choosing the correct repair method for the particular window.
Whether you live in a house, apartment, or older property, this guide explains how to inspect window seals, remove damaged caulk, apply new sealant, and identify situations that require professional attention. We will also cover common mistakes, different window materials, maintenance tips, and ways to make your repair last longer.
1. Understanding What It Means to Reseal Windows
Resealing windows means repairing or replacing the materials that prevent unwanted air and water from passing through gaps around a window. These materials may include exterior caulk, interior sealant, compressible weatherstripping, glazing compound, or specialized gaskets. The correct solution depends on the location of the leak and the design of the window.
For example, if you notice a small gap between the exterior window frame and the surrounding wall, exterior-grade caulk may be the appropriate choice. If cold air enters between a movable sash and its frame, replacing worn weatherstripping may be more effective. These problems can look similar at first, but they require different repairs.
It is also important to distinguish between resealing a window frame and repairing the seal inside double-glazed glass. The former is often a manageable DIY project, while the latter usually requires professional glass-unit replacement. Understanding this distinction helps you avoid spending time and money on a repair that cannot solve the actual problem.
2. Signs That Your Windows Need Resealing
One of the clearest signs of a failing window seal is a noticeable draft. You might feel cool air near the frame on a windy day, even when the window appears to be completely closed. Small openings around the frame can allow air to move between the interior and exterior, making rooms uncomfortable and potentially increasing heating or cooling costs.
Another warning sign is damaged caulk. Look for cracks, gaps, brittle material, peeling edges, or sections that have separated from the window frame or wall. Exterior sealant can deteriorate faster when it is regularly exposed to sunlight, rain, temperature changes, and building movement.
Moisture problems can also indicate a sealing issue. You may notice damp patches near the window, peeling paint, water stains, or deterioration of the surrounding trim. However, condensation on the glass does not automatically mean the exterior caulk has failed. Condensation can result from indoor humidity, cold glass surfaces, or a failed insulated-glass unit. Identifying the source of the moisture is an important first step.
3. Common Reasons Window Seals Fail
Window seals naturally deteriorate as they age. Caulk may gradually lose its flexibility, shrink, harden, or separate from the materials it was originally bonded to. Even a properly installed sealant has a limited service life, and its durability depends on the product, the installation quality, and the conditions surrounding the window.
Weather is another major factor. Strong sunlight can break down some sealants, while repeated cycles of heating and cooling can cause window frames and surrounding walls to expand and contract. Rain, frost, wind, and humidity may accelerate deterioration, particularly when the original sealant was unsuitable for outdoor use.
Poor installation can also cause premature failure. Applying new caulk over dusty surfaces, old loose material, wet substrates, or incompatible sealant can prevent proper adhesion. Excessively wide gaps may require backing material rather than a thick bead of caulk. In addition, structural movement, damaged frames, and persistent roof or wall leaks may cause recurring problems that ordinary resealing cannot fix.
4. Tools and Materials Needed to Reseal Windows
Gathering the right supplies before you begin makes the job easier and helps produce a cleaner, longer-lasting result. You do not need an expensive collection of equipment for most straightforward repairs, but you should use products designed for the location and materials of your window.
Here are the basic tools and materials you may need:
- Utility knife or caulk removal tool
- Plastic scraper or suitable putty knife
- Caulking gun for cartridge-based sealant
- Exterior-grade or interior-grade window sealant, as appropriate
- Compatible backer rod for suitable wide joints
- Cleaning cloths and a soft brush
- Mild detergent and water, or a compatible surface cleaner
- Painter’s tape for creating neat edges
- Gloves and eye protection
- Ladder and appropriate fall-protection equipment, if needed
You may also need a sealant smoothing tool, replacement weatherstripping, or glazing supplies, depending on the type of repair. Always read the product label before purchasing materials. Check the recommended joint width, compatible surfaces, temperature range, curing time, and whether the product is suitable for exposure to rain and sunlight.
5. Choose the Right Sealant for Your Windows
Choosing the correct sealant is one of the most important parts of learning how to reseal windows. Different products are designed for different materials and environmental conditions. A sealant that works well around an indoor wooden trim may not provide the durability needed for an exposed exterior joint.
Common window sealant options
For exterior frame-to-wall joints, select a sealant specifically rated for exterior use and compatible with the frame, wall finish, and existing materials. For interior trim, a paintable product may be more convenient because you can paint it after it cures.
Avoid assuming that every product labeled “silicone” or “window caulk” is suitable for every application. Some sealants are designed for particular substrates or joint configurations. Never block drainage openings or weep holes that are intentionally built into window systems to allow water to escape.
6. Inspect Your Windows Before Starting the Repair
Before removing any old material, inspect the entire window carefully. Check the top, bottom, and both sides of the frame, paying particular attention to corners and joints where different materials meet. Look for missing caulk, loose trim, cracks in the surrounding wall, deteriorated wood, and visible gaps.
Next, examine the movable parts of the window. Open and close the sash if it is safe to do so, and check whether it locks securely. Worn weatherstripping, misaligned hardware, or a poorly fitting sash can allow air to pass through even when the exterior frame-to-wall seal is in good condition.
Finally, look for signs of deeper damage. Soft wood, extensive staining, bubbling paint, recurring dampness, or mold-like growth may indicate that moisture has been entering for some time. If the frame is rotten or the wall is actively leaking, address the underlying problem before applying new sealant. Covering damaged material with caulk can conceal the symptoms without resolving the cause.
7. Step One: Remove the Old, Damaged Caulk
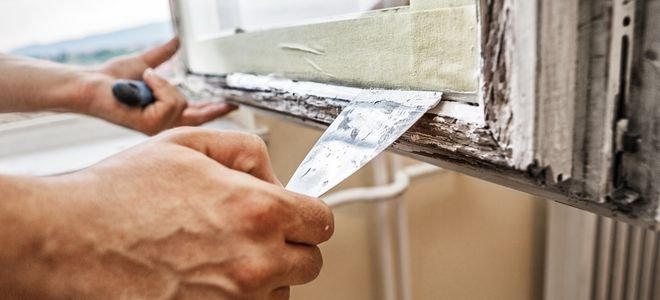
Start by removing loose, cracked, or deteriorated caulk from the joint you intend to reseal. Use a suitable caulk removal tool or utility knife carefully to separate the old material from the frame and surrounding surface. Work slowly, keeping the cutting edge away from your hands and taking care not to scratch glass, damage finishes, or cut into concealed flashing.
Once the larger sections have been removed, use a plastic scraper or another suitable tool to clear remaining residue. Some old sealants may require a compatible removal product, but you should test any chemical remover in an inconspicuous area first. Follow the manufacturer’s safety instructions, provide appropriate ventilation, and avoid using solvents that could damage plastic frames, painted surfaces, or insulation.
A strong repair usually requires a clean, stable bonding surface. Do not simply spread a fresh bead over loose or failing material and expect it to hold. If the old sealant is firmly bonded and the product manufacturer specifically permits an overlay repair, a different approach may sometimes be appropriate. However, complete removal of failed material is generally the more reliable method when the existing joint has deteriorated.
8. Step Two: Clean and Prepare the Window Surface
After removing the old caulk, clean the joint to eliminate dust, dirt, loose paint, and other contaminants. A soft brush and a suitable cleaning solution are often sufficient for ordinary grime. Rinse or wipe the area as directed by the cleaner’s instructions, making sure no residue remains that could interfere with adhesion.
Allow the surfaces to dry completely if the selected sealant requires a dry substrate. Some specialized products can tolerate damp surfaces, but you should never assume this applies to the product you have purchased. Check the manufacturer’s instructions, especially when working outdoors or after rain.
Inspect the joint once more before proceeding. Remove any remaining loose particles, and repair unstable paint or deteriorated material as needed. If the opening is unusually deep or wide, consult the sealant manufacturer’s recommendations about joint preparation and backing material. Proper preparation is not the most exciting part of the project, but it often makes the difference between a durable repair and one that begins peeling within a short period.
9. Step Three: Protect the Surrounding Areas With Painter’s Tape
Painter’s tape can help you create neat, professional-looking sealant lines, particularly if you are inexperienced with a caulking gun. Place one strip along each side of the joint, leaving the intended bead width exposed. Press the tape down firmly enough to prevent sealant from creeping underneath it.
Take your time around corners and areas where the frame meets uneven masonry or siding. A perfectly straight line is not always possible on older buildings, so focus on creating a continuous, well-bonded seal rather than forcing the bead into an unsuitable shape. The finished joint should accommodate the expected movement of the materials.
Use tape that is appropriate for the surface, and avoid leaving it in place longer than recommended. Some adhesives can leave residue or damage delicate finishes if the tape remains attached too long. Painter’s tape is helpful, but it is optional; experienced installers can often create clean lines without it by controlling the bead and smoothing it carefully.
10. Step Four: Apply the New Window Sealant
Cut the tip of the sealant cartridge at an angle, starting with a relatively small opening. Many cartridges have markings that help you choose a nozzle size, but the opening should match the width of the joint you need to fill. Insert the cartridge into the caulking gun and release the plunger pressure when you are ready to position the nozzle.
Place the tip against the joint and squeeze the trigger steadily while moving along the gap. Aim to produce one continuous bead that contacts both sides of the joint. Maintaining consistent pressure and movement helps prevent thin spots, air pockets, and excessive buildup. For long joints, work at a comfortable pace rather than trying to rush the entire window.
Pay particular attention to corners and transitions between different materials. These areas are common places for gaps to develop, so the sealant should connect smoothly without leaving openings. However, do not apply sealant over drainage channels or weep holes, and do not cover intentional openings that are part of the window’s designed water-management system.
11. Step Five: Smooth the Sealant and Finish the Joint
After applying the bead, smooth it according to the sealant manufacturer’s directions. Use a compatible smoothing tool or another recommended method to press the material into contact with the joint surfaces. The aim is to create a continuous seal with good adhesion, not merely a decorative layer sitting on top of the gap.
Avoid using excessive water, household cleaners, or improvised smoothing solutions unless the product instructions explicitly allow them. Certain substances can interfere with adhesion, discolor surfaces, or affect curing. If the sealant begins to skin over, repeated smoothing may damage the finish rather than improve it.
Remove painter’s tape at the time recommended by the sealant manufacturer, often while the material is still workable. Pull the tape away carefully so it does not drag sealant across the surrounding surface. Inspect the finished bead for visible gaps, bubbles, or sections that failed to contact both sides of the joint. Correct defects while the material is still suitable for finishing, following the product’s instructions.
12. Step Six: Allow the Sealant to Cure Properly
One of the most common DIY mistakes is disturbing fresh sealant too soon. A product may become dry to the touch before it has cured throughout its thickness. Curing time depends on the sealant formulation, bead depth, temperature, humidity, and exposure conditions.
Read the packaging to determine when the repaired area can safely be exposed to rain, painted, cleaned, or subjected to normal use. Some products cure relatively quickly at the surface but need substantially longer to develop their full properties. Cool temperatures, thick beads, and certain environmental conditions can slow the process.
Protect the area from rain, dust, and accidental contact when necessary. Avoid opening or closing a window in a way that puts pressure on fresh sealant around moving parts. If the forecast is unsuitable for the product’s application requirements, postpone the repair rather than risking a poor bond. Patience at this stage helps protect all the preparation and application work you have already completed.
13. How to Reseal Windows From the Inside
Interior resealing is useful when you find gaps between the window frame and the interior trim or wall. Begin by checking whether the gap is simply a cosmetic opening or part of a larger moisture problem. If water stains, soft drywall, or persistent dampness are present, investigate the source before sealing the interior surface.
For small, dry gaps around interior trim, a paintable caulk rated for the relevant materials is often a suitable choice. Remove loose material, clean the joint, allow it to dry, and apply a narrow, continuous bead. Smooth the sealant and let it cure before painting, following the manufacturer’s instructions.
Interior sealing can reduce drafts and improve comfort, but it should not be used to conceal exterior water intrusion or obstruct ventilation designed into the window assembly. In some wall systems, moisture needs a specific route to escape, so sealing every visible opening without understanding its function can create problems. If you are unsure whether a gap is intentional, consult the window manufacturer’s guidance.
14. How to Reseal Windows From the Outside
Exterior resealing protects the junction between the window frame and the surrounding building materials from wind and rain. Because this area is exposed to changing temperatures, ultraviolet light, and moisture, the sealant must be suitable for outdoor use and capable of accommodating the expected movement of the joint.
Begin by examining the exterior perimeter, including the head, sides, and sill. Remove failing sealant, clean the bonding surfaces, and repair any unstable material. Follow the building or window manufacturer’s details for flashing and water management. The precise arrangement differs between masonry, timber, vinyl siding, and other wall systems, so do not assume that every gap should be filled with caulk.
Apply the new sealant only to appropriate joints, using a continuous bead with proper contact on both sides. Keep drainage openings clear, and do not cover flashing details that are intended to direct water away from the building. If the repair requires working at height, especially above the ground floor, use a qualified professional rather than taking unnecessary risks on a ladder.
15. How to Reseal Double-Glazed Windows
Double-glazed windows contain two panes of glass separated by a spacer and sealed around the perimeter to create an insulated glass unit. This construction helps reduce heat transfer and, in many designs, limits condensation between the panes. The seal inside the glass unit is different from the caulk applied around the outside of the window frame.
If you notice fogging, persistent condensation, or mineral-like deposits trapped between the glass panes, the insulated glass unit may have failed. Reapplying exterior caulk will not restore the original hermetic seal between the panes. The usual solution is to have the glass unit assessed and, when necessary, replaced while retaining the existing frame if it remains serviceable.
However, condensation on the room-facing glass surface may simply result from high indoor humidity and a cold window surface. Exterior condensation can also occur under certain weather conditions and is not necessarily evidence of a fault. Confirm where the moisture is located before deciding what repair is needed.
16. How to Replace Worn Window Weatherstripping
Weatherstripping creates a flexible barrier between movable parts of a window, such as the sash and frame. Unlike perimeter caulk, it must allow the window to open and close properly. When weatherstripping becomes flattened, brittle, torn, or detached, air may pass through the gaps even if the frame-to-wall seal is intact.
First, identify the window type and the existing weatherstripping profile. Common options include foam tape, compression seals, adhesive-backed strips, and specialized profiles fitted into grooves. Select a replacement that is compatible with the window design and suitable for the size of the gap. A strip that is too thick may prevent the sash from closing or locking correctly.
Remove the old weatherstripping, clean the attachment surface, and install the replacement according to the manufacturer’s instructions. Test the window after installation to make sure it moves freely and closes securely. If the sash is warped or the locking hardware is misaligned, replacing the weatherstripping alone may not resolve the draft.
17. How to Reseal Wooden Window Frames
Wooden windows can look attractive and last for many years when properly maintained, but they need particular attention because moisture can damage the timber. Before resealing, examine the frame for peeling paint, cracked joints, swelling, soft spots, and signs of rot. Sealant will not restore the strength of decayed wood.
Remove loose caulk and deteriorated paint from the repair area using methods suitable for the existing finish. If the wood is sound, prepare the surface as directed by the chosen sealant or coating manufacturer. Some products require bare wood to be primed, while others are designed for specific painted or treated surfaces. Compatibility is important because wood expands and contracts with changes in moisture content.
After preparing the joint, apply a suitable sealant and allow it to cure. Where the exposed timber needs repainting, use a compatible exterior coating after the sealant has reached the required stage. For significant rot, damaged joints, or loose glazing, have the frame repaired by a qualified professional. Repeatedly caulking deteriorated timber can hide damage and make later repairs more difficult.
18. How to Reseal Vinyl and Aluminum Windows
Vinyl and aluminum windows are generally low-maintenance, but their perimeter joints and moving seals can still deteriorate. Vinyl frames may expand and contract with temperature changes, while aluminum frames can have different thermal properties and finishes that affect sealant selection. Both materials require products that bond properly to the relevant surfaces.
For vinyl windows, avoid harsh solvents and tools that can scratch or damage the frame. Use a sealant approved for the particular vinyl and surrounding wall material. For aluminum windows, verify that the product is compatible with the frame finish and any adjacent metals. Some sealants may be unsuitable for certain coatings or metal combinations.
Before applying new sealant, inspect the frame’s drainage design and manufacturer-provided joints. Many modern windows rely on internal drainage paths to manage water that enters certain parts of the assembly. Blocking these paths can cause water to collect where it was never intended to remain. If the window’s construction is unfamiliar, consult its installation instructions before sealing any openings.
19. How to Find Air Leaks Around Windows
Finding the precise source of a draft helps you choose the right repair. On a cool or windy day, carefully check the perimeter of a closed window for moving air. You can also inspect for visible daylight through gaps, loose weatherstripping, and cracks in the trim or caulk.
A thin strip of tissue held near a suspected gap can sometimes reveal air movement. Keep it away from flames, hot surfaces, and moving parts. Do not use an open candle or lighter to test drafts around windows, because this creates an unnecessary fire risk.
Remember that air movement around a window does not always originate from the exterior caulk. It may be caused by the sash, locking mechanism, a gap between the frame and rough opening, or an adjacent wall cavity. If you cannot identify the source, a professional energy assessment or building-envelope inspection may help locate hidden leakage.
20. How Much Does It Cost to Reseal Windows?
The cost of resealing windows depends on the number of windows, the type of sealant, accessibility, the extent of deterioration, and local labor rates. A straightforward DIY repair may require only a few basic tools and one or more cartridges of sealant. If you already own a caulking gun and scraper, your material costs may be relatively modest.
Professional costs can be higher because they may include inspection, removal of old material, surface repairs, access equipment, and labor. Repairs involving upper floors, damaged frames, extensive water intrusion, or specialized glazing systems can cost substantially more than simple perimeter caulking.
It is worth comparing the cost of a proper repair with the potential expense of ignoring the problem. Persistent water intrusion can damage trim, plasterboard, paint, insulation, and timber. Request a written estimate if the work is extensive, and make sure the contractor explains whether the quote covers only sealant replacement or also addresses damaged materials and the underlying source of leakage.
21. Common Mistakes to Avoid When Resealing Windows
One of the biggest mistakes is applying new caulk directly over cracked or loose material. The fresh sealant may appear neat initially, but it can separate along with the deteriorated layer underneath. Proper removal and surface preparation give the replacement product a much better chance of bonding securely.
Another common error is choosing the wrong product. Interior-only caulk may not withstand exterior conditions, while an unsuitable sealant may fail to bond to a particular frame finish. Some products cannot be painted, and others require specific primers or joint dimensions. Always check the technical information rather than relying on appearance or price alone.
Finally, avoid sealing every gap you can see. Some openings are designed for drainage, ventilation, or movement, and filling them may interfere with how the window works. Do not use excessive sealant to compensate for rotten timber, loose frames, missing flashing, or structural damage. Correct the underlying problem first, then reseal the appropriate joints.
22. Safety Tips to Follow When Resealing Windows
Although resealing a window is often a simple home improvement task, safety should always come first. Wear protective gloves and eye protection when removing old caulk, cutting cartridge tips, or handling cleaning products. Read the instructions for any sealant remover, primer, or solvent, and maintain suitable ventilation when working indoors.
Be particularly careful around glass. Cracked panes, damaged glazing, and loose glass can create serious cuts. If a window is unstable or the glass is damaged, avoid putting pressure on the frame and arrange professional assistance. Never lean out of an open window to reach an exterior joint.
Working at height introduces additional risks. Do not lean dangerously from a ladder or attempt to reach an awkward window from an unstable position. Upper-floor exterior resealing may be better left to a trained professional with suitable access equipment. If you cannot complete the repair safely, hiring someone experienced is the sensible choice.
23. How Often Should You Reseal Windows?
There is no single resealing schedule that works for every home. The lifespan of window sealant depends on its formulation, exposure to sunlight and rain, movement between building materials, and the quality of the original installation. Some joints may remain in good condition for years, while others deteriorate much sooner.
A practical approach is to inspect your windows at least once or twice a year, ideally before periods of heavy rain or extreme temperatures. Check for cracks, gaps, peeling sealant, damaged weatherstripping, and signs of moisture around the frames. Inspect more frequently if your property is exposed to severe weather or if previous leaks have occurred.
Replace sealant when it shows signs of failure rather than relying only on its age. Regular inspection allows you to catch small defects before they develop into larger problems. Keeping a record of repairs, products used, and installation dates can also help you plan future maintenance.
24. How to Check Whether Your Window Resealing Worked
After the sealant has cured fully, inspect the repaired joint along its entire length. Look for gaps, pinholes, areas that have pulled away from the surface, and corners where the bead is discontinuous. If you find a defect, determine whether it can be corrected according to the product instructions or whether the affected section needs to be removed and reapplied.
Next, check the window’s operation. Open and close the sash, test the locks, and make sure no new sealant is interfering with moving components. Examine the weatherstripping to confirm that it makes appropriate contact when the window is closed without preventing normal operation.
During the next suitable period of rain, inspect the interior for signs of water entry. Do not deliberately flood the window with a hose, as this can force water into places it would not normally reach. If moisture or drafts continue after the repair, reassess the source rather than repeatedly adding more caulk. Persistent problems may indicate defective flashing, damaged framing, a failed glass unit, or another issue that requires specialist attention.
25. When Should You Call a Professional?
DIY resealing is appropriate for many small, accessible gaps, but certain situations call for expert help. Extensive water damage, rotten frames, loose windows, significant cracks in surrounding walls, and repeated leaks are signs that the problem may extend beyond the sealant itself.
A professional may also be necessary when dealing with complex commercial windows, historic glazing, large glass panels, inaccessible upper floors, or insulated glass units with failed internal seals. A qualified installer can identify whether the problem involves the window, the wall opening, the flashing, or the glass assembly.
When choosing a contractor, ask about experience with your window type and the proposed repair method. Request details about the materials, preparation work, curing requirements, and any warranty offered. A reliable professional should explain the source of the problem and why the recommended solution is appropriate, rather than simply promising to apply another layer of caulk.
26. Frequently Asked Questions About How to Reseal Windows
Can I reseal windows without removing the old caulk?
Sometimes, but it depends on the condition of the existing material and the sealant manufacturer’s instructions. If the old caulk is cracked, loose, peeling, or poorly bonded, removing it is generally the better approach. Applying fresh material over a failed layer can lead to another early failure.
If the existing sealant is sound and an approved repair method allows an overlay, additional sealant may be appropriate in limited circumstances. However, the surfaces must be compatible, clean, and suitable for bonding. Always follow the product’s technical guidance.
What is the best sealant for exterior windows?
The best option is a product specifically rated for exterior window joints and compatible with the window frame and surrounding wall materials. Exterior silicone, suitable hybrid sealants, and certain polyurethane products may be appropriate, depending on the application.
Consider movement capability, weather resistance, paintability, and joint dimensions before purchasing. No single product is ideal for every window, so check the manufacturer’s specifications.
Can I reseal windows from the inside only?
Yes, for certain problems involving interior trim gaps or suitable interior joints. Interior resealing can help reduce drafts when the leakage path is located at the interior perimeter.
However, it does not replace a necessary exterior repair or correct failed flashing and damaged frames. If water is entering from outside, investigate and address the source instead of simply covering the interior symptoms.
How long does window sealant take to dry?
The answer varies by product. Some sealants become touch-dry relatively quickly, while complete curing can take considerably longer. Temperature, humidity, and bead thickness also influence the process.
Check the packaging for specific drying, curing, painting, and rain-exposure requirements. Do not assume that a surface that feels dry is ready for heavy exposure.
Why are my windows still drafty after resealing?
The leak may be coming from worn weatherstripping, a poorly fitting sash, damaged locking hardware, or gaps hidden behind the trim. Air may also travel through the surrounding wall assembly.
Inspect the full window system and identify the actual air path before making further repairs. If the source is difficult to locate, consider a professional inspection.
Does resealing windows reduce energy bills?
Properly sealing genuine air leaks can improve comfort and reduce unwanted air exchange, which may lower heating or cooling demand. The savings depend on the size of the leaks, the local climate, the window’s condition, and the efficiency of the rest of the building.
Resealing cannot compensate for every insulation problem. Single glazing, inefficient glass units, and poorly insulated walls may require additional improvements.
Can I paint over newly applied window caulk?
Only if the sealant is designed to be painted. Many acrylic and siliconized acrylic products accept paint after the recommended curing period, while conventional silicone sealants are often not paintable with ordinary household paints.
Check the product instructions for paint compatibility and timing. Applying paint too early can affect the finish and may interfere with the sealant’s performance.
Should I replace the entire window if the seal fails?
Not necessarily. A failed perimeter caulk joint can often be repaired without replacing the window. Worn weatherstripping can also frequently be replaced separately.
If the frame is badly damaged, the window is structurally unsafe, or the insulated glass unit has failed, more extensive repairs may be necessary. Have the window assessed before deciding that complete replacement is the only option.
Is resealing windows a beginner-friendly DIY project?
Yes, many accessible perimeter caulking repairs are suitable for beginners who can follow product instructions and work safely. The most important skills are careful inspection, proper removal of failed material, surface preparation, and controlled sealant application.
More complex repairs involving structural damage, glass replacement, flashing, or work at height are better handled by experienced professionals.
Can resealing windows prevent mold?
Resealing can help reduce moisture entry when a defective joint is allowing rainwater inside. Correcting such leaks may reduce conditions that encourage mold growth.
However, mold can also develop because of high indoor humidity, condensation, plumbing leaks, or other moisture sources. Fix the underlying cause, dry affected materials, and address any significant contamination appropriately.
Conclusion: Mastering How to Reseal Windows for a More Comfortable Home
Learning how to reseal windows is a valuable home maintenance skill that can help protect your property from drafts, rainwater, and avoidable deterioration. With a suitable sealant, basic tools, and careful preparation, many small window-sealing problems can be handled without replacing the entire window.
The process starts with identifying the source of the problem. Remove failed caulk where necessary, clean and prepare the surfaces, choose a compatible product, apply a continuous bead, and allow it to cure according to the manufacturer’s instructions. Remember that movable window parts may need new weatherstripping rather than caulk, while fogging between double-glazed panes may require a different repair altogether.
Most importantly, do not treat resealing as a substitute for repairing damaged frames, failed flashing, or persistent moisture problems. Regular inspections and prompt repairs can help prevent small defects from becoming expensive issues.
With the right approach, you can maintain a more comfortable indoor environment, protect the materials around your windows, and extend the useful life of your existing window system.
YOU MAY HAVE MISED